Unlocking Vibrant Colors: Your Guide to German DIY Easter Egg Dyeing

Frohe Ostern! The Magic of German Easter Eggs
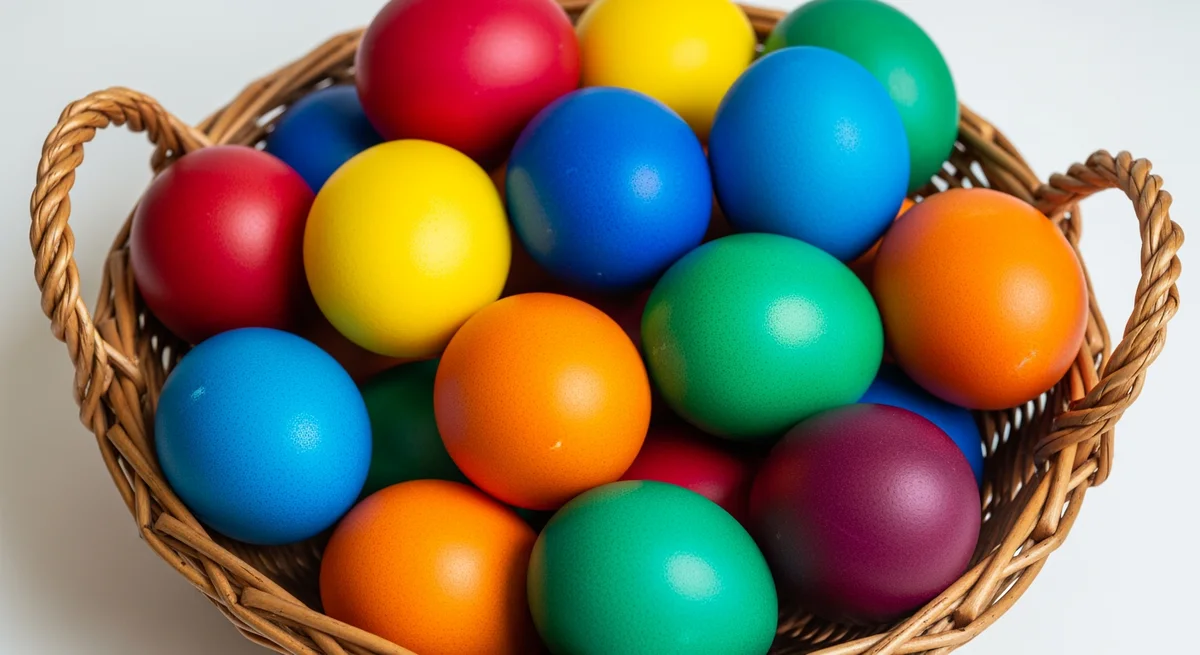
Hey fellow food lovers and craft enthusiasts! There's something truly magical about Easter, and for me, a huge part of that magic comes from the incredibly vibrant Easter eggs we'd make growing up in Germany. Forget pale pastels; we're talking about colors that pop, almost jewel-toned and deeply saturated. If you've ever wondered how to get those rich, deep, eye-catching eggs, you're in the right place. I'm going to share the secrets to mastering German-style DIY Easter egg dyeing, so you can bring a little bit of that radiant tradition into your home.
More than just a fun craft, dyeing Easter eggs is a cherished tradition that brings families together, marking the arrival of spring with a burst of color. And trust me, the German approach is all about achieving maximum impact!
The German Secret to Dazzling Hues
The secret to those truly dazzling German Easter eggs often lies in a combination of good technique and, traditionally, specific types of dyes designed for intensity. While natural dyes are wonderful and have their own charm, for that super bright, almost electric brightness, many German households still reach for those convenient dye packets or concentrated liquid dyes. But it's not just the dye; it's how you use it. We'll focus on methods that ensure maximum color absorption and shine, making your eggs look like they just came from a professional decorator.
What You'll Need: Your Essential Egg Dyeing Toolkit
Before you dive in, gather your supplies. Having everything ready makes the process smooth and enjoyable:
- Eggs: For the brightest, truest colors, white eggs are your best bet. Hard-boil them, then let them cool completely to room temperature. This is crucial for even dye absorption and to prevent cracking in the dye bath.
- Egg Dye: You can find food-safe egg dyes in liquid, gel, or powder packet forms at most grocery stores or craft shops around Easter. For truly intense German colors, I highly recommend checking out Heitmann Egg Dyes on Amazon. This brand is a staple in Germany and is known for its incredible potency and vibrant results!
- White Vinegar (
Essig): This is your secret weapon! Vinegar acts as a mordant, helping the color cling to the eggshell and deepen the hue. - Containers: Small bowls, mugs, or heat-safe jars for each individual color. Re-purpose old yogurt containers or jam jars.
- Spoons or Tongs: For gently lowering and removing eggs from the dye bath.
- Drying Rack: An old cooling rack or simply layers of paper towels work perfectly.
- Optional Supplies for Advanced Techniques:
- Wax Crayons: For wax-resist designs.
- Dry Onion Skins: For beautiful, natural rustic browns and oranges.
- Vegetable Oil or Olive Oil: For that gorgeous, glossy finish.
- Protection: Old newspaper, an old tablecloth, and rubber gloves are highly recommended to protect your workspace and hands from stains.
Step-by-Step: The German Way to Vibrant Easter Eggs
Ready to get started? Here's the tried-and-true method for achieving those German-style vibrant eggs:
-
Prep Your Eggs: As mentioned, ensure your eggs are clean, hard-boiled, and completely cooled to room temperature. Warm eggs can lead to uneven dye absorption and are more prone to cracking when introduced to a cooler liquid.
-
Mix Your Dye Baths: Follow the specific instructions on your dye package, but a general guideline is to combine:
1 cup (240ml)warm water (not hot, as it can cook the egg further)1-2 tablespoonswhite vinegar (don't skip this!)- Your chosen egg dye (adjust quantity for desired intensity). Stir well until the dye is fully dissolved. Make sure you have a separate bowl for each color.
-
Dip and Immerse: Gently lower one egg at a time into a dye bath using a spoon or tongs. Ensure the egg is fully submerged. The magic really happens here: the longer the egg soaks, the deeper and more vibrant the color will become. For super intense, jewel-toned colors, let your eggs soak for
5-10 minutes, or even longer for truly deep hues. You can periodically check the color by lifting the egg briefly. -
Dry with Care: Once your egg has reached your desired color intensity, carefully lift it out of the dye bath. Let any excess liquid drip off, then place the egg on your drying rack or several layers of paper towels. Allow them to dry completely. This can take an hour or two.
-
Add That German Shine (Optional, but Highly Recommended!): Once your eggs are completely dry, take a tiny drop of vegetable oil or olive oil on a paper towel. Gently rub the oil all over each egg. This small step makes a huge difference, giving your eggs that beautiful, glossy, polished finish that makes them truly sparkle!
Beyond Basic Dipping: Fun German Techniques
While solid colors are beautiful, you can get even more creative:
- Wax Resist (Die Wachstechnik): This is a classic! Before dyeing, use a white or clear wax crayon to draw designs, patterns, or even names on your hard-boiled eggs. The wax repels the dye, leaving your design in white (or the original egg color) against the dyed background. It's simple, yet yields stunning results.
- Marbled Eggs: After dipping an egg in one color and letting it dry slightly, add a few drops of a contrasting dye or some oil (mixed with a drop of dye) to the surface of another dye bath. Swirl gently with a toothpick, then dip your egg quickly to pick up the marbled pattern.
- Onion Skin Eggs (Zwiebelschalen-Eier): For beautiful, rustic, natural reddish-brown eggs with unique patterns, this is the way to go. Wrap raw eggs tightly in dry onion skins (red or yellow), securing the skins around the egg with a piece of old nylon stocking or string. Then, hard-boil the eggs as usual. The pigments from the onion skins will transfer onto the egg, creating lovely, earthy patterns.
Pro Tips for Dazzling Eggs Every Time
- White Eggs for True Colors: Brown eggs will always yield a more muted, earthy tone. If you want bright, choose white.
- Vinegar is Your Best Friend: Seriously, don't skip it! It's the key to intense, long-lasting color that won't just rub off.
- Room Temperature is Key: Warm eggs are more prone to cracking and absorbing dye unevenly. Patience with cooling pays off.
- Patience Pays Off (Again!): For truly deep, rich colors, let those eggs soak. You can even leave them in the dye bath in the fridge overnight for incredible saturation (just check your dye's safety instructions for extended soaking).
- Less Is More with Oil: A tiny amount of oil creates a beautiful sheen. Too much will make your eggs greasy.
- Protect Your Workspace: Dye can stain! Cover your table with newspaper or an old tablecloth, and wear gloves to keep your hands colorful, not stained.
Common Pitfalls to Avoid
Even experienced dyers can make mistakes. Here are some common ones to sidestep:
- Using Hot Eggs: Leads to uneven color and potential cracks when introduced to cooler dye baths.
- Not Enough Vinegar: Results in pale, weak colors that don't adhere well to the shell.
- Overcrowding the Dye Bath: Each egg needs space to absorb color evenly. Dye one or two at a time.
- Rushing the Drying Time: Smudges and uneven finishes are likely if you handle eggs before they're fully dry.
- Using Raw Eggs (Unless Blown Out): Always hard-boil your eggs first if you intend to display or eat them. If you're blowing them out to preserve the shells, ensure they are thoroughly cleaned.
Practicing Your Easter Egg Art
Like any craft, egg dyeing gets easier and more fun with practice. Don't be afraid to experiment with different dyes, techniques, and soak times. Each egg is a little canvas, and the joy is truly in the creation and seeing those beautiful colors emerge. You'll quickly discover your favorite methods and develop your own unique style.
Making Easter eggs is more than just a craft; it's a cherished tradition, a creative outlet, and a beautiful way to welcome spring. By following these German-inspired techniques, you'll be well on your way to creating a basket full of vibrant, stunning eggs that will impress everyone at your Easter table. Happy dyeing, and Frohe Ostern!